Introduction
Firstly, thank you for purchasing Evergreen Sports. Your purchase helps to fund community projects in the UK and around the world, for more information on that visit this page: http://evergreenpa.org/evergreen-themes/
In this guide, I’ll walk you through the basic set up of the theme and how to use it’s features. If you need more help then please contact us on ThemeForest.
Initial Installation
You will need to have WordPress already set up, instructions on setting up WordPress can be found http://codex.wordpress.org/Installing_WordPress.
Once you have WordPress installed, unzip the files you’ve downloaded from ThemeForest, you’ll find a zip file labelled EvergreenSports-ThemeToUpload.zip, this is the file you will need to upload to WordPress.
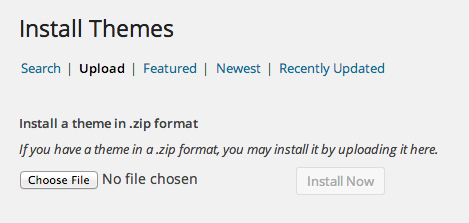
In your WordPress admin, navigate to Appearance -> Themes and click the Add New button. On the page that loads, click the “Upload” link.
Upload the EvergreenSports-ThemeToUpload.zip file using the upload field on this page, and then click the “Install Now” button.
Once the theme has been installed you should see a link asking you to “Activate” the theme, click that link.
Once activated, you should be taken directly to the theme options page. In the theme options, click the “Save Changes” button at the bottom to set the default options.
Managing the Fixtures and Teams
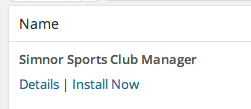
The theme works with the Simnor Sports Club Manager plugin: http://wordpress.org/plugins/simnor-sports-club-manager/ which allows you to mange your fixtures and players, the plugin is free to download and use. To install the plugin log in to your WordPress admin and navigate to Plugins -> Add New. In the search field add “Simnor Sports Club Manager” and click the “Search Plugins” button.
On the results that appear click the “Install Now” link:
Click “OK” on the alert that appears and you should see a screen like this:
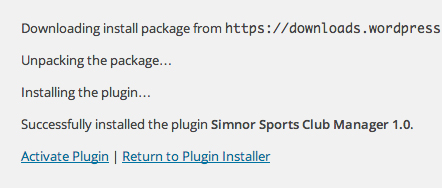
Click the “Activate Plugin” link and the plugin will be fully installed and ready for you to start adding your teams and fixtures, more on that later in the documentation.
Introduction to the theme options
This theme has a number of theme options for you to edit. To access the theme options, navigate to Appearance -> Theme Options.
The options are separated into tabs, simply click one of the tabs at the top of the page to navigate through them. Once you’ve made the changes you would like to make, click the “Save Changes” button at the bottom of the page.
Choosing your colours and fonts
To choose which fonts and colours you want to use, navigate to Appearance -> Theme Options in the admin area and click the “Styling” tab. Here you’ll see the option to select the heading and paragraph font.
Under the fonts options are the colour selectors, these are for the background colour (white on the demo), the accent colour (green on the demo), the link hover colour (dark grey on the demo), widget heading background colour (light grey on the demo), widget heading text colour (white on the demo) and the text colour (dark grey on the demo).
If you want to change other styles on the site, you can also add some CSS in the “Custom CSS” field.
Adding your logo or using a site title
The theme allows you to either use a logo or text if you don’t have a logo. The ideal height for the logo is no bigger than 100 pixels, however the header area will resize to accommodate whatever size logo you use. To upload your logo navigate to the Appearance -> Theme Options page and on the first tab you’ll see the logo option:
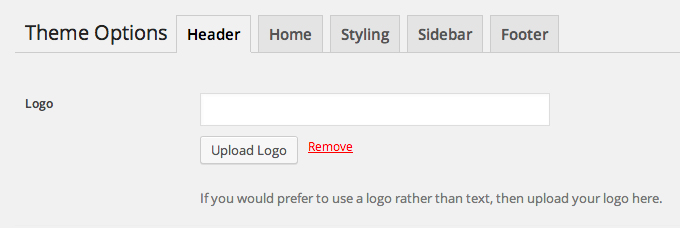
Click the “Upload Logo” button and the WordPress media manager will appear, click the “Upload Files” tab if it isn’t already showing it and then click the “Select Files” button. Add the logo from your computer and then click the “Use this File” button in the bottom right of the manager. Your logo should then appear under the Logo field.
If you would prefer to just use text instead of a logo, then don’t add a logo and it will show the title of the site you’ve set in the WordPress settings. If you would like something else to show as your title then you can use the “Alternative Title” field in the theme options.
Adding your header social links
To the right of the header in this theme there is the option to have social links (Facebook, Twitter etc.). These are added via the Theme Options page. To add a new social link navigate to the Appearance -> Theme Options page and scroll down to the “Social Links” section. Click the “Add new social link” button. A panel should appear above the button:
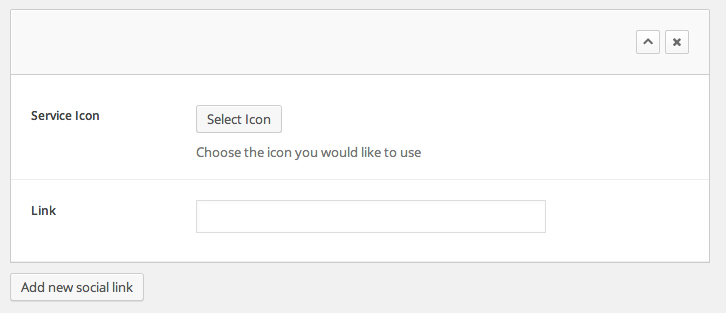
Click the “Select Icon” button and you’ll see a number of social icons appear which you can select from. Click on one of the icons to select it and then fill out the link field underneath. Then save the theme options and the new social link should appear in the header on your site. You can re-order these social links but clicking and dragging on the panels, to remove a social link click the “x” button to the right of the panel and to edit the options of a link click the downwards arrow button.
Setting up the main menu
The theme comes with a main menu and a footer menu. The main menu appears under the header and the footer menu appears under the copyright message at the bottom of the site. These menus use the standard WordPress menu’s management system. For a full tutorial on setting this up you can use the WordPress documentation here: http://codex.wordpress.org/WordPress_Menu_User_Guide
Setting up the home page
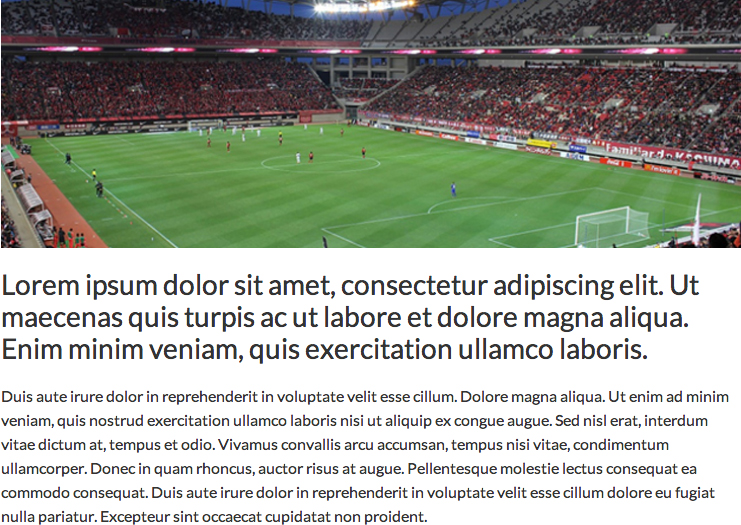
By default the site will show the latest blog posts, what you actually want is the home page like it is in the demo. So to setup the initial home page you need to log into the WordPress admin and create a new page (Pages -> Add New). Give your page a title (eg, Home) and in the editor add the content you’d like to show in the “Welcome” section of the home page:
Once you’ve added the content you’d like to show on the home page then you need to set that page to use the “Home” page template. To do this on the right of the “Add New Page” page you’ll see a box labelled “Page Attributes”:
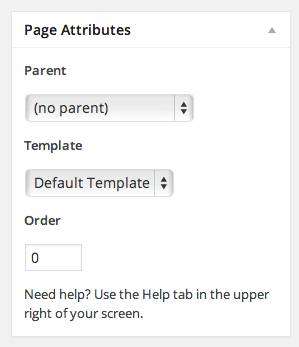
You need to choose the “Home” option from the “Template” select field. And then click the Publish button to create your home page.
Now navigate to Settings -> Reading in your WordPress admin and in the “Front page displays” option:
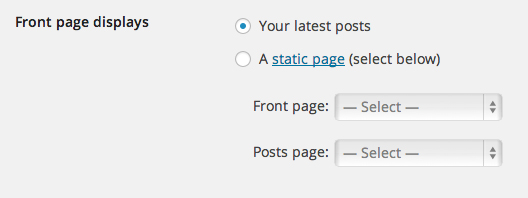
Choose the “A static page (select below)” option. This will then enable the select fields below, choose the “Home” page you just created in the “Front page:” select field. And then click the “Save Changes” button. Now when you go to your website’s home page, the new page you created will show.
Setting up the home page slider
If you would like to use a home page slider then you can set this up in the Theme Options. Navigate to Appearance -> Theme Options and select the “Home” tab. At the top of this page you’ll see a button labelled “Add new slide”, click this button and a panel will appear to allow you to edit the slide options:
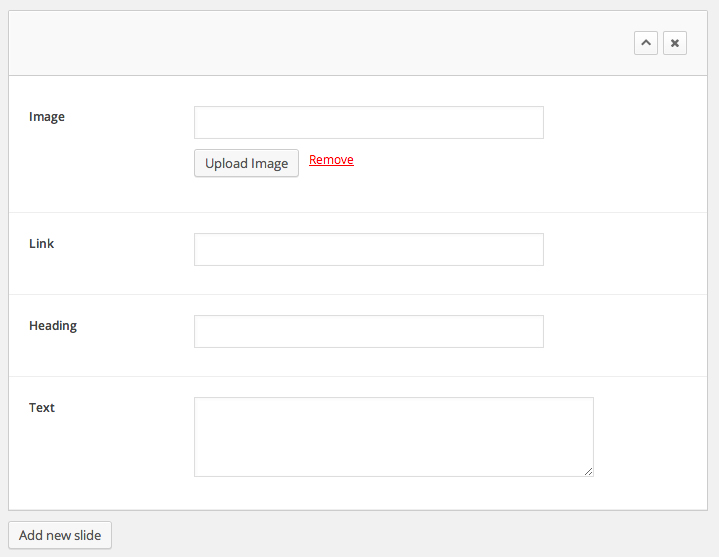
To upload the image click the “Upload Image” button and the WordPress media manger will appear for you to upload your image (see logo section above for more details on that). The recommended image size is 1500 pixels width x 520 pixels height.
If you would like the image to be linked then you can add the link URL in the “Link” field. The “Heading” field is the main text over the image (shows in the larger font size) and the “Text” field is the small text underneath the heading.
To add more slides just click the “Add new slide” button. If you would like to remove a slide then click the “x” button to the right of the panel and if you would like to edit a slide click the downwards arrow button. If you would like to re-order slides then click and drag the panels around.
By default the slider will change slides every 6 seconds, if you would like to change this then you can change it to the number of seconds you’d like in the “Slide Interval” field.
Setting up the home announcement
The home announcement is the grey section just under the home slider on the home page:

To change this click the “Home” tab in the Theme Options and scroll down to the “Home Announcement” section, here you can change the tagline, text, button text and button link. To disable this announcement section then just leave the “Text” field empty.
Setting up the rest of the home page
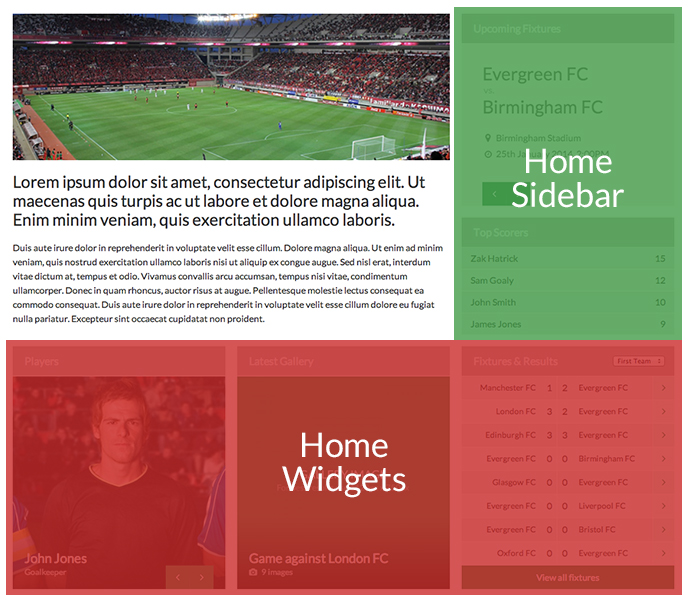
The rest of the home page is made up of widgets. There are two widget areas specific to the home page, this is the area to the right of the home page content (the Welcome section), in the demo this section shows the Upcoming Fixtures and Top Scorers widgets, this widget section is called “Home Sidebar” on the Appearance -> Widgets page. Underneath this is the “Home Widgets” section which is a three column widget area.
The theme comes with 5 custom widgets:
- Gallery – A widget to show a link to a specific gallery
- Latest Posts – Displays the latest posts along with a date and thumbnail
- Upcoming Fixture – Shows the next fixture and any future fixtures from the Simnor Sports Club Manager plugin
- Players – Shows the players from a team managed by the Simnor Sports Club Manager plugin
- Top Players – A widget to show your top scorers
The theme works with the Simnor Sports Club Manager plugin: http://wordpress.org/plugins/simnor-sports-club-manager/ which allows you to mange your fixtures and players, with this plugin there is a widget called “Fixtures and Results” which can be used in these widget ready areas as well.
To add widgets to a widget ready area you can follow the official WordPress guide here: http://codex.wordpress.org/WordPress_Widgets
Setting up the footer area
The footer area is made up of two sections, the “Bottom Widgets” section which is managed via the WordPress widgets section in Appearance -> Widgets. The official WordPress guide here: http://codex.wordpress.org/WordPress_Widgets explains how to add widgets to this section.
The second section is the footer where you can add a copyright message and a footer menu. To set up the copyright message navigate to the Appearance -> Theme Options page and click the “Footer” tab. You’ll see a field labelled “Footer Text”, add your footer message here and click the “Save Options” button.
Adding Teams
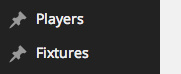
Teams are managed by the Simnor Sports Club Manager plugin, see the “Managing the Fixtures and Teams” section near the start of this documentation for an explanation of how to install the plugin. Once the plugin has been fully installed you’ll see a “Players” option in the admin menu:
The first thing we want to do is set up the team(s), so navigate to Players -> Teams. On the left of this page you’ll see the option to add a new team and on the right it will list your teams so you can edit them. To add your team add the team name into the “Name” field:
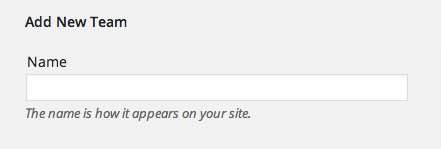
and then click the “Add New Team” button.
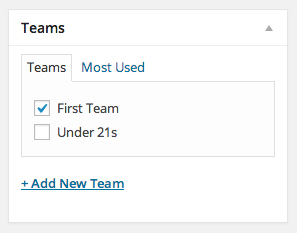
Once you’ve added your team you can start adding players. To do this navigate to Players -> Add New. Give your player a name and then add a biography or some other content you’d like into the main editor. On the right add a tick to the team you want this player to be part of:
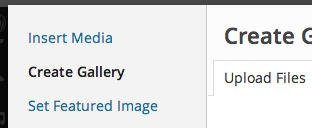
Next you can add the player image, this uses the WordPress featured image functionality. To add a new image click the “Set featured image” link in the “Player Image” section on the right:

and upload the image using the WordPress media manager.
Under the editor you’ll see a section called “Player Options”:
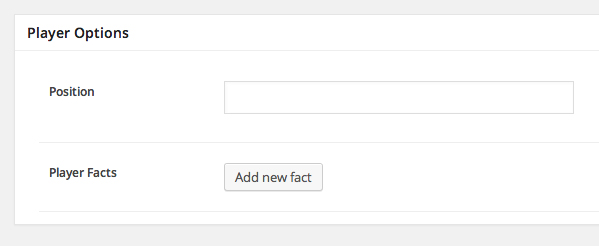
This is where you can add the position of the player (eg, Goalkeeper, Defender etc.) and then add some player facts. A player fact could be their age, height etc. and these display under the player image when viewing a player’s profile.
Creating the team page
To show a team on your site you’ll need to use a shortcode. To do this create a page as normal via Pages -> Add New. In the editor add this text (shortcode):
[players]
When you visit the page on your site this text will be replaced with the image for the team players. If you would like to show a specific team then use:
[players team=”Team Name Here”]
Where “Team Name Here” is the name of the team you added, for example if you called your team “Evergreen FC” then the shortcode would be:
[players team=”Evergreen FC”]
Adding Fixtures
Fixtures are managed by the Simnor Sports Club Manager plugin, see the “Managing the Fixtures and Teams” section near the start of this documentation for an explanation of how to install the plugin. Once the plugin has been fully installed you’ll see a “Fixtures” option in the admin menu:
The first thing we want to do is set up the team(s), follow the guide above to do this. Once you’ve got your team set up then we want to set up a season, to do this navigate to Fixtures -> Seasons. On the left of this page you’ll see the option to add a new season and on the right it will list your seasons so you can edit them. To add a season add the season name into the “Name” field, eg, 2013 – 2014.
Now that we have a season, we can start to add fixtures. To add a fixture navigate to Fixtures -> Add New. Give your fixture a name that you’ll be able to use later to find the fixture, for example this could be the team you’re playing and the date of the game. In the editor you can add some content, this could be the game report, it could be travelling instructions for the game or pretty much anything else you like.
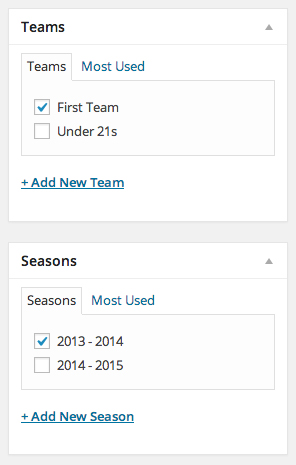
On the right of the page you can add the fixture to a team and to a season, to do this just tick the relevant options:
Under the editor, you’ll see the “Fixture Options”. This is made up of three tabs, the first tab is the fixture details:

This is where you can add the date, time and location of the fixture.
The next tab is the “Home Team” tab where you can add the Team Name (eg, London FC) and the score (if you’ve played the game already). And the final tab is the “Away Team” tab where you can add the away team name and score.
Creating the fixture page
To show a fixture list on your site you’ll need to use a shortcode. To do this create a page as normal via Pages -> Add New. In the editor add this text (shortcode):
[fixtures_table season=”Season Name Here”]
Where “Season Name Here” is the name of the season you added, for example if you called the season “2013 – 2014″ then the shortcode would be:
[fixtures_table season=”2013 – 2014”]
Adding Galleries
This theme comes with a gallery custom post type, these galleries use the default WordPress gallery feature. To create a new gallery, navigate to Galleries -> Add New in the admin area. Give your gallery a title and then in the editor, click the “Add Media” button. The WordPress media manager will appear, click the “Create Gallery” link:
Then click the “Select Files” button to upload your photos. Once the images have finished uploading, click the “Create a new gallery” button in the bottom right. On the next screen you can add some captions and re-order the images. Once you’re happy click the “Insert gallery” button in the bottom right. This will add a gallery placeholder in your editor.
Under the editor you will see a field labelled “Excerpt”, this shows on the galleries page next to the thumbnail.
By default the thumbnail that’s used in the widget and the galleries main page is the first image from your gallery, if you would like a specific image to be used for this thumbnail then you can upload it as the featured image on the right of the Edit Gallery page.
Now all you need to do is create the actual galleries page. To do this you need to create a new page by going to Pages -> Add New, and then in the editor add the shortcode: [galleries]
Using Shortcodes
This theme uses my “Simnor Shortcodes” plugin which can be found at: http://wordpress.org/extend/plugins/simnor-shortcodes/
In your WordPress admin area, navigate to Plugins -> Add New.
In the “Search” field type “Simnor Shortcodes” and click the “Search Plugins” button.
Click the “Install Now” link.
You should then get a message alert appear, click “OK”.
It will then download and install the plugin for you, once completed click the “Activate Plugin” link. You will then have Simnor Shortcodes fully installed. When you next go to add/edit a page or post you should see a new button on the toolbar that looks like this:
![]()
In the editor place your cursor where you would like the shortcode to appear and then click the toolbar button, this will open an inline window. Clicking a tab on the left of this window will give you the options for each individual shortcode, fill out the options and then click the “Insert Shortcode” button and the shortcode will appear in your editor.
Sidebars
The theme comes with a widget ready sidebar, you can add widgets to it via the Appearance -> Widgets page. To choose where the sidebar shows on the site go to Appearance -> Theme Options and click the “Sidebar” tab. You’ll see a bunch of checkboxes for you to select which areas of the site the sidebar should show.
Further support
If you’re stuck and need further support then please leave a comment on the ThemeForest listing page or by sending an email through our profile page: http://themeforest.net/user/evergreenpa. We can provide support for general theme issues, such as if you are stuck setting the theme up to look like the demo or if you spot a bug. However, we can’t provide advanced technical support or customisation services, there are a bunch of companies out there that can assist you with that for a fee, you can find them by searching Google for “wordpress customisation service”.